Phi-3 is the most recent LLM release from Microsoft. In this version the creators chose to use similar blocks to Llama2 so that it could integrate seamlessly into existing frameworks and also kept it small enough (3.8b params) to be feasible to run on consumer CPUs while still outperforming models twice its size.
In this article I’m going to be running through how I setup a minimal REST API to serve Phi-3 on my MacBook Air, and I’ll be sharing some stuff I learned along the way. The code for this article can be found in this repo.
The Stack
Here’s a quick overview of the frameworks and projects I explored and used to bring the project to life:
In the subsequent sections I’ll run through how I used each of these as we build the project from the ground up.
API Design
There’s already a lot of projects out there which streamline building APIs with LLM chat endpoints - vllm, text-generation-webui, and ollama to name a few. All of these are really great and allow for serving various model formats flexibly, but here we’ll be building a simplified version with the bare necessities.

The API will consist of one chat endpoint (/chat/completions) supporting GET and POST requests. POST requests are how we perform inference with the hosted LLM while the GET route handler will render the conversation history. We’ll also make use of Redis to cache the outputs of expensive API calls.
Setup your virtual environment and install the dependencies as below. Note: all the dependencies for each step in the build can be found in the repo’s requirements.txt file.
python -m venv venv
source venv/bin/activate
pip install -U pip && pip install flask redis
Next we setup the basic structure of the API, defining the different routes and indicating their intended behaviours. Don’t worry if the logic isn’t in place yet, we’ll add that later.
# app.py
from flask import Flask, jsonify, request, render_template

app = Flask(__name__)

@app.route("/chat/completions/", methods=["POST", "GET"])
def do_chat():
  if request.method == "GET":
    pass

  elif request.method == "POST":
    pass
We also add redis to the mix by initializing a client with the Redis Python API and connecting at default port 6379. In order for the client to connect, we first need a running instance of the redis server. To do so, ensure you have redis installed locally (if you have homebrew this is straightforward) and run redis-server in a different terminal instance.
brew install redis
redis-server
We only need two lines of code to connect to the running sever:
#app.py
...
import redis
redis_client = redis.Redis(host="localhost", port=6379)
When we get to dockerizing everyhing later we’ll need to change the host from “localhost” to the docker-compose service name of the db.
Serving Phi-3
The smallest version of Phi-3, Phi-3-mini-4k-instruct, is about 7.64 GB in its unquantized state. Since I’m going to be running the model locally, I ideally want to use a quantized version which doesn’t destroy my RAM and which has decent token generation speed. At the time of writing, popular quantization libraries like bitsandbytes, autoawq, and hqq either require a GPU to quantize or don’t support the Phi-3 architecture.
Luckily, however, microsoft released a 4bit gguf quant (found here) which we can use with existing libraries like llama-cpp-python. Additionally, microsoft/onnxruntime-genai provides direction on converting Phi-3 to onnx format in this readme. We’ll explore both of these options as well as the original unquantized version.
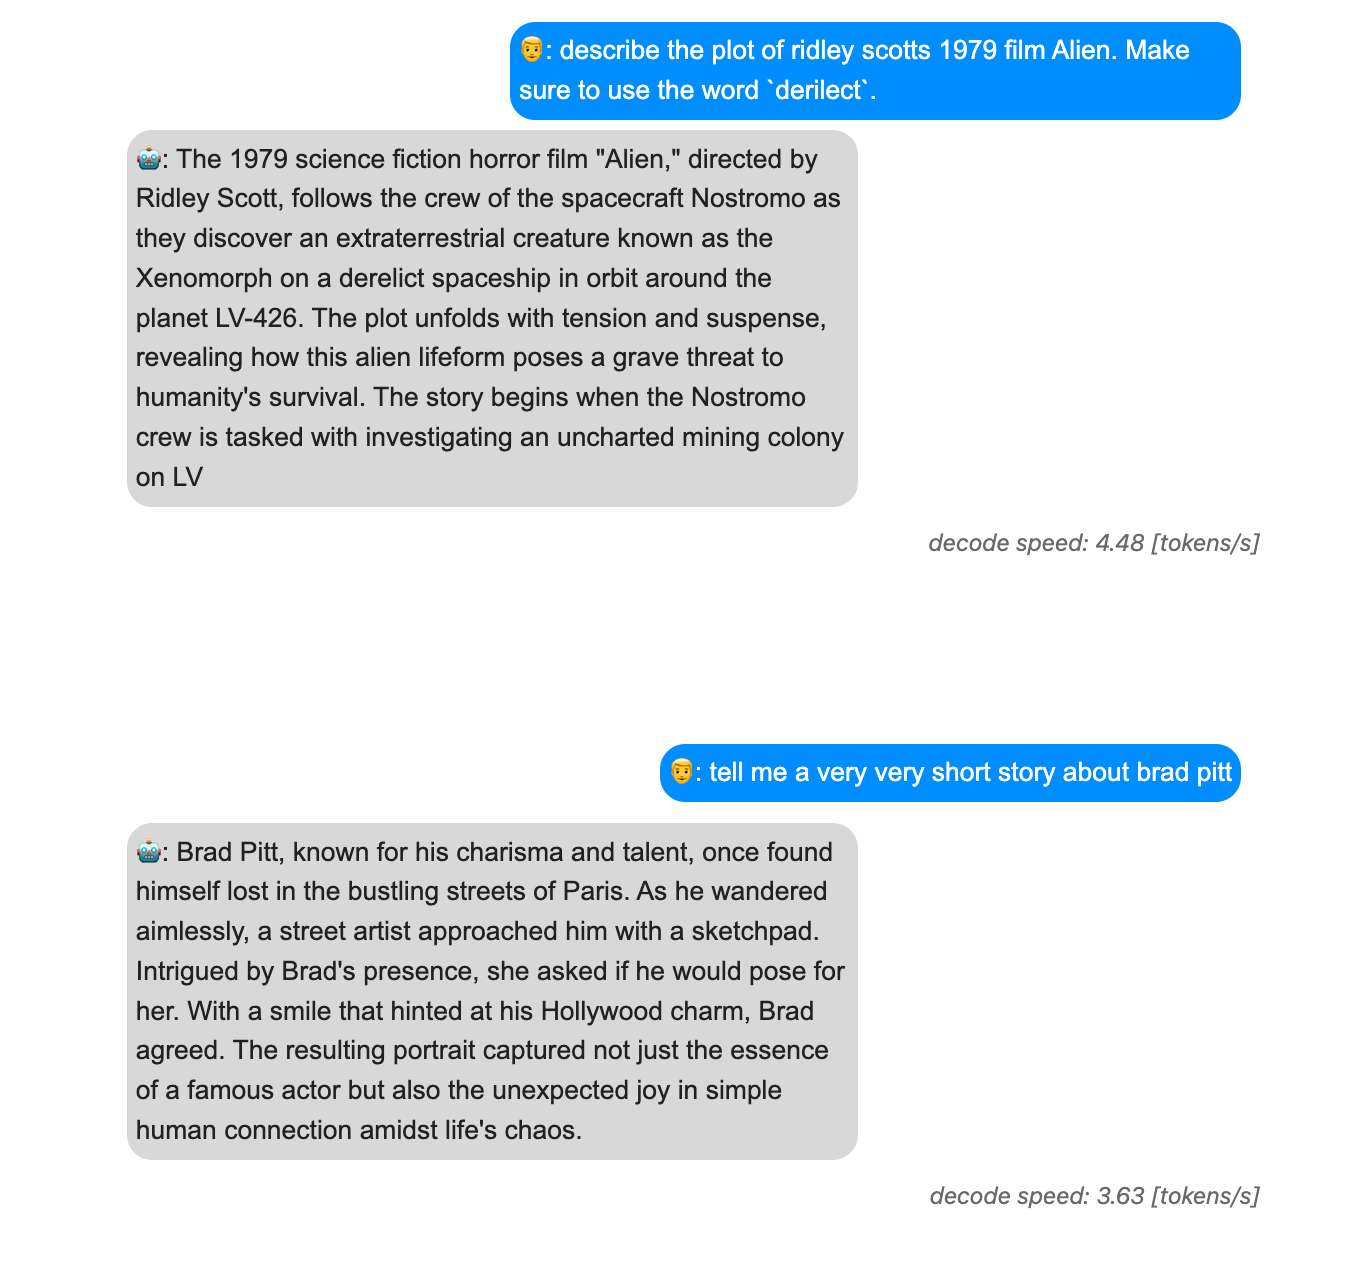
Here’s a gif of the model being served on my computer’s CPU (hence the latency)
I was hoping to give vllm a shot as our inference engine, but ran into problems in the installation related to #2411. Already off to a good start!
Let’s quickly run through a quick example of doing inference with Phi-3 in each of the frameworks mentioned so that we can choose the right one for our API.
inference with Hugging Face 🤗
The readme for the model’s Hugging Face page shows all the code necessary to do inferences with the unquantized model.
Note: Its important you have transformers installed at the nightly version to have access to the Phi3ForCausalLM architecture:
pip install git+https://github.com/huggingface/transformersinference with llama.cpp 🦙
Install the Python bindings and build the package by running from inside your virtualenv:
pip install llama-cpp-pythonTo get the gguf model weights we can clone microsoft’s repo and download the data ourselves. To do this make sure you have git-lfs installed. Again, this can be done with homebrew using brew install git-lfs.
git clone https://huggingface.co/microsoft/Phi-3-mini-4k-instruct-gguf
cd Phi-3-mini-4k-instruct-gguf
git lfs pull --include "Phi-3-mini-4k-instruct-q4.gguf"
With the model weights downloaded we can build and time a simple inference pipeline as such:
from llama_cpp import Llama
import time

path = "path-to-your-gguf"
llm = LlamaCPPLLM(path)

inputs = [{"role":"user", "content":"Tell me a funny joke please."}]
kwargs = {
  "temperature": 0.2,
  "max_tokens": 32,
}

start = time.time()
outputs = llm.create_chat_completion(messages=inputs, **kwargs)
stop = time.time()
print(f"{outputs['usage']['completion_tokens']} tokens generated in {stop-start} s.")
inference with onnxruntime-genai 🤖
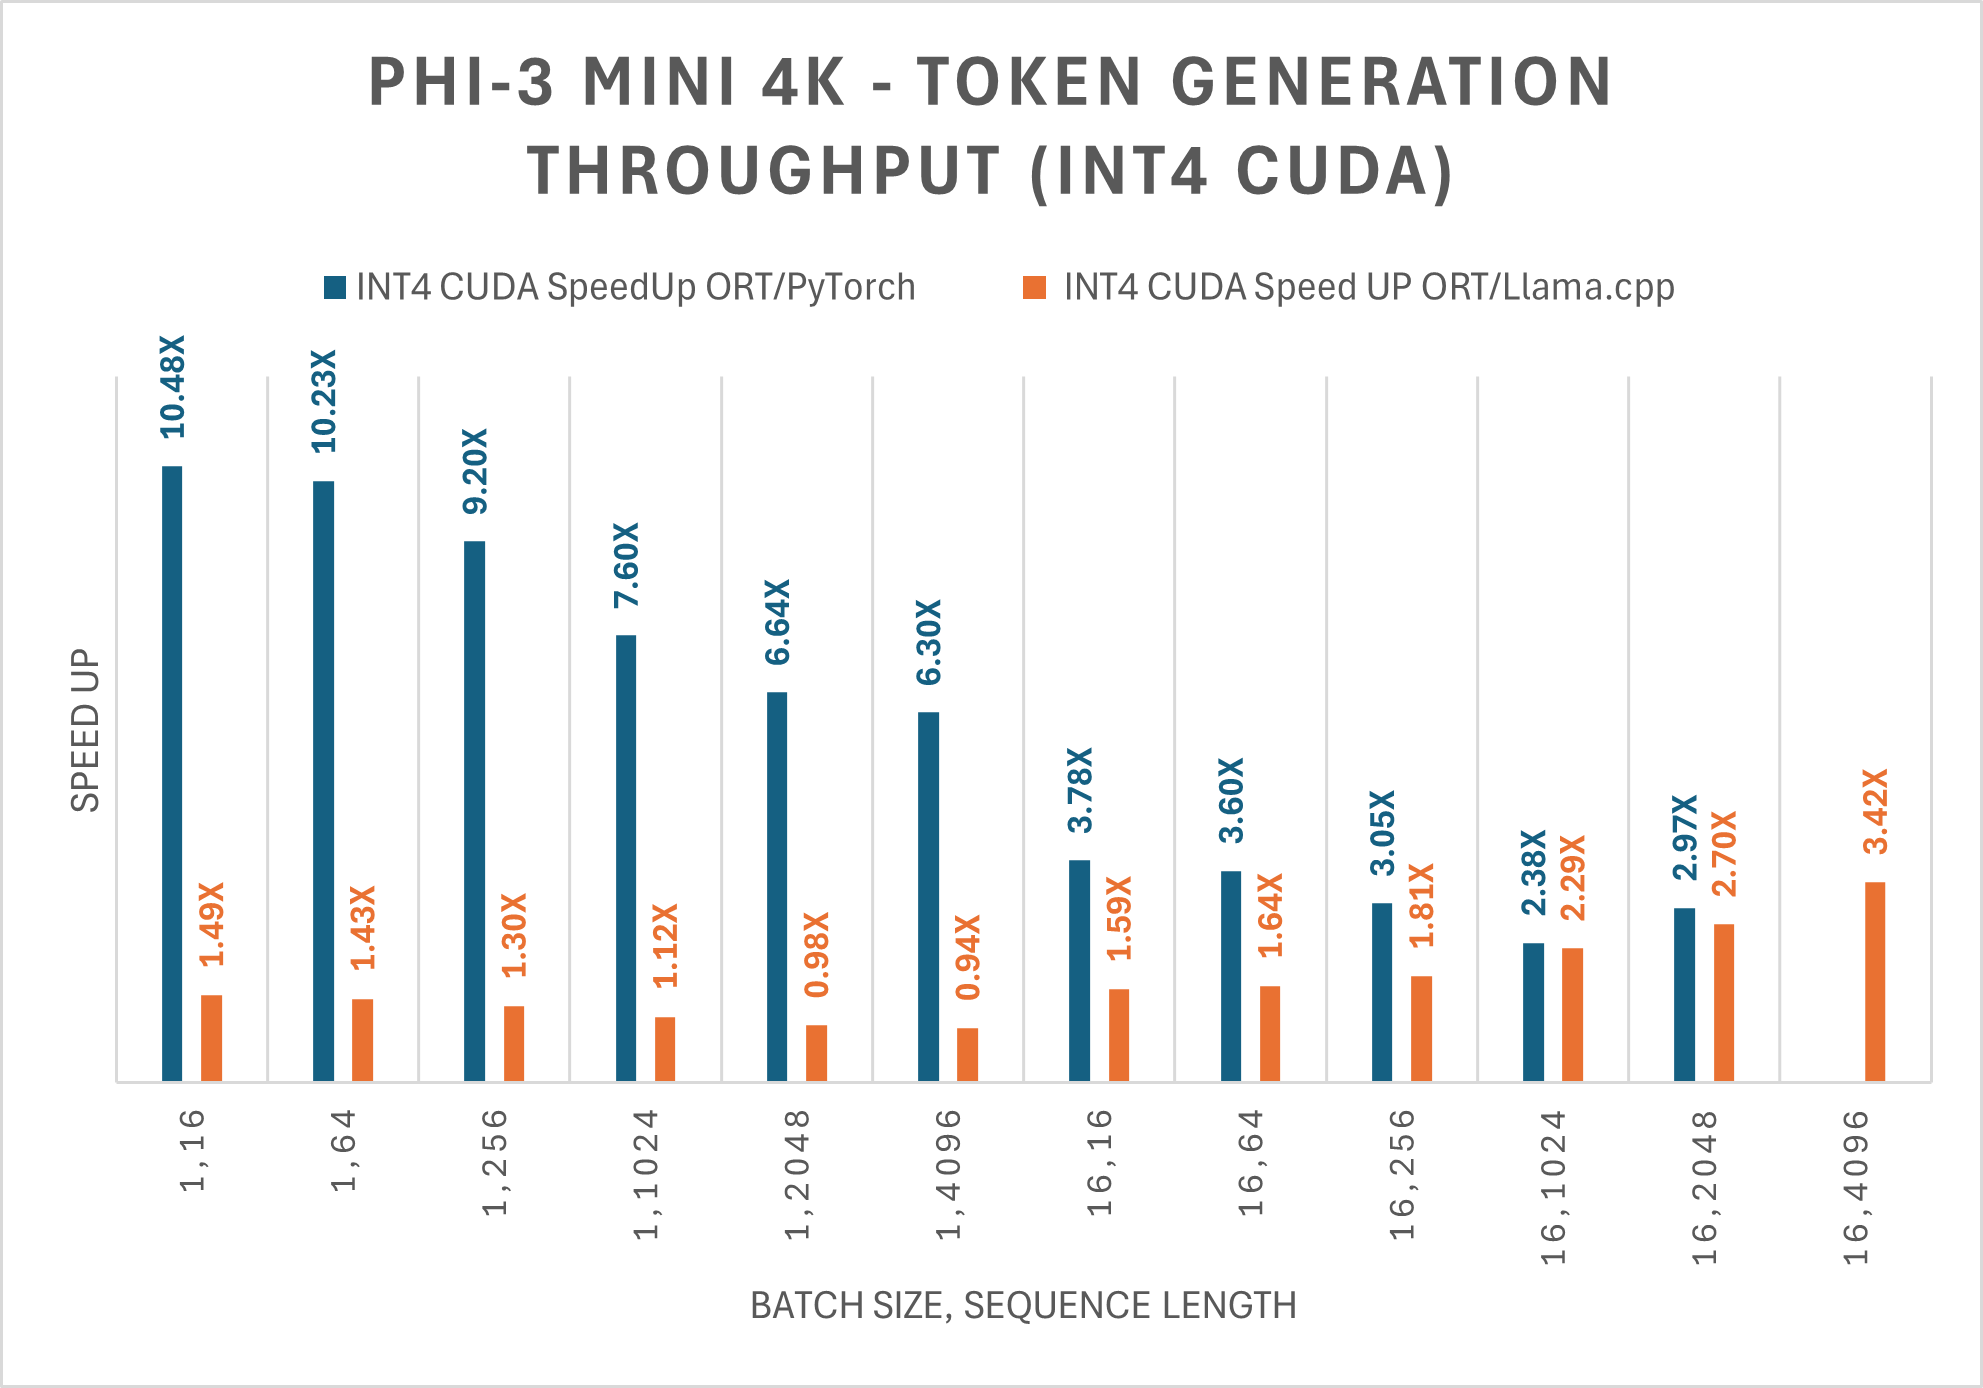
I was really curious about deploying Phi-3 with onnxruntime given the impressive speedups claimed in this blogpost. My MacBook doesn’t have a GPU so I wasn’t anticipating the same performance boosts they were mentioning, but I’ve had really nice experiences with ONNX in the past when working with CNNs and wanted to see how the graph optimizations would perform on LLMs locally using only the CPUExecutionProvider.
To get the model weights run the following:
pip install huggingface-hub[cli]
huggingface-cli download microsoft/Phi-3-mini-4k-instruct-onnx --include cpu_and_mobile/cpu-int4-rtn-block-32-acc-level-4/* --local-dir .
In terms of API design, onnxruntime-genai is a bit more involved than huggingface and llama.cpp. Instead of providing a model generate call we need to instantiate an onnxruntime_genai.Generator from an llm and generation kwargs before iterating through the generator until you either reach your max token limit or hit an EOS token.
# phi3-onnx.py
import onnxruntime_genai as og
import time

model = og.Model(f'path-to-onnx-data-dir')
tokenizer = og.Tokenizer(model)

chat_template = '<|user|>\n{input} <|end|>\n<|assistant|>'
prompt = f'{chat_template.format(input="Tell me a funny joke please.")}'
input_tokens = tokenizer.encode(prompt)

params = og.GeneratorParams(model)
search_options = {"temperature": 0.2, "max_length": 100, "do_sample": True}
params.set_search_options(**search_options)
params.input_ids = input_tokens

generator = og.Generator(model, params)


start = time.time()
completion_tokens = []

while not generator.is_done():
  generator.compute_logits()
  generator.generate_next_token()
  completion_tokens.append(generator.get_next_tokens()[0])

stop = time.time()

outputs = tokenizer.decode(completion_tokens)
print(outputs)
print(f"{len(completion_tokens)} tokens generated in {stop-start} s.")
As of writing, the onnxruntime-genai package will only build in a linux environment, so I had to boot up a Python image based on debian with Docker to run everything:
docker run -it --rm -v $(pwd):/app python:3.10-bookworm /bin/bash
pip install numpy && pip install --pre onnxruntime-genai
cd app && python phi3-onnx.py
Which framework to choose?
| method | size (GB)↓ | speed (tokens/sec)↑ |
|---|---|---|
| original | 7.64 | 0.16 |
| gguf | 2.39🥇 | 5.46🥇 |
| onnx | 2.72 | 2.14 |
Clearly using the unquantized model is a terrible choice; it runs an order of magnitude slower than the quantized models which translates to around a 5 minute wait time to generate 50 tokens. With that all said, I’m going to be moving towards the llama.cpp framework to handle inferencing given its nice OpenAI-compatible interface and speedy decoding relative to the other alternatives considered.
Back to the API
To incorporate Phi-3 into the API we modify app.py from the first section as follows:
...

@app.route("/chat/completions/", methods=["POST", "GET"])
def do_chat():
    if request.method == "GET":
        context = {}
        keys = redis_client.keys("*chat*")
        values = [json.loads(redis_client.get(k)) for k in keys]

        # keys prefixed with 'chat:'
        keys = [json.loads(k[5:]) for k in keys]
        chats = [k + [v["choices"][0]["message"]] for k, v in zip(keys, values)]

        speeds = [v["speed"] for v in values]

        context["objects"] = [
            {"chat_history": c, "speed": s} for c, s in zip(chats, speeds)
        ]

        # render jinja template
        return render_template("chat.html", context=context)

    elif request.method == "POST":
        request_context = request.get_json()

        # default some kwargs
        chat_context = {
            "messages": [
                {"role": "user", "content": "hey!"},
            ],
            "temperature": 0.8,
            "max_tokens": 256,
        }
        chat_context.update(request_context)

        partial_key = json.dumps(chat_context["messages"])
        key = "chat:" + partial_key

        cache = redis_client.get(key)
        if cache:
            latest_response = json.loads(redis_client.get(key))
            return latest_response

        start = time.time()
        outputs = llm.generate(**chat_context)
        stop = time.time()
        outputs["speed"] = round(
            outputs["usage"]["completion_tokens"] / (stop - start), 2
        )

        # cache
        redis_client.set(key, json.dumps(outputs))

        return jsonify(outputs)


if __name__ == "__main__":
    app.run("0.0.0.0", port=4440, debug=True)
Here we cache LLM responses using as keys the json-dumped conversation history so that we can keep a full record of the exchanges which we’ll render upon GET.
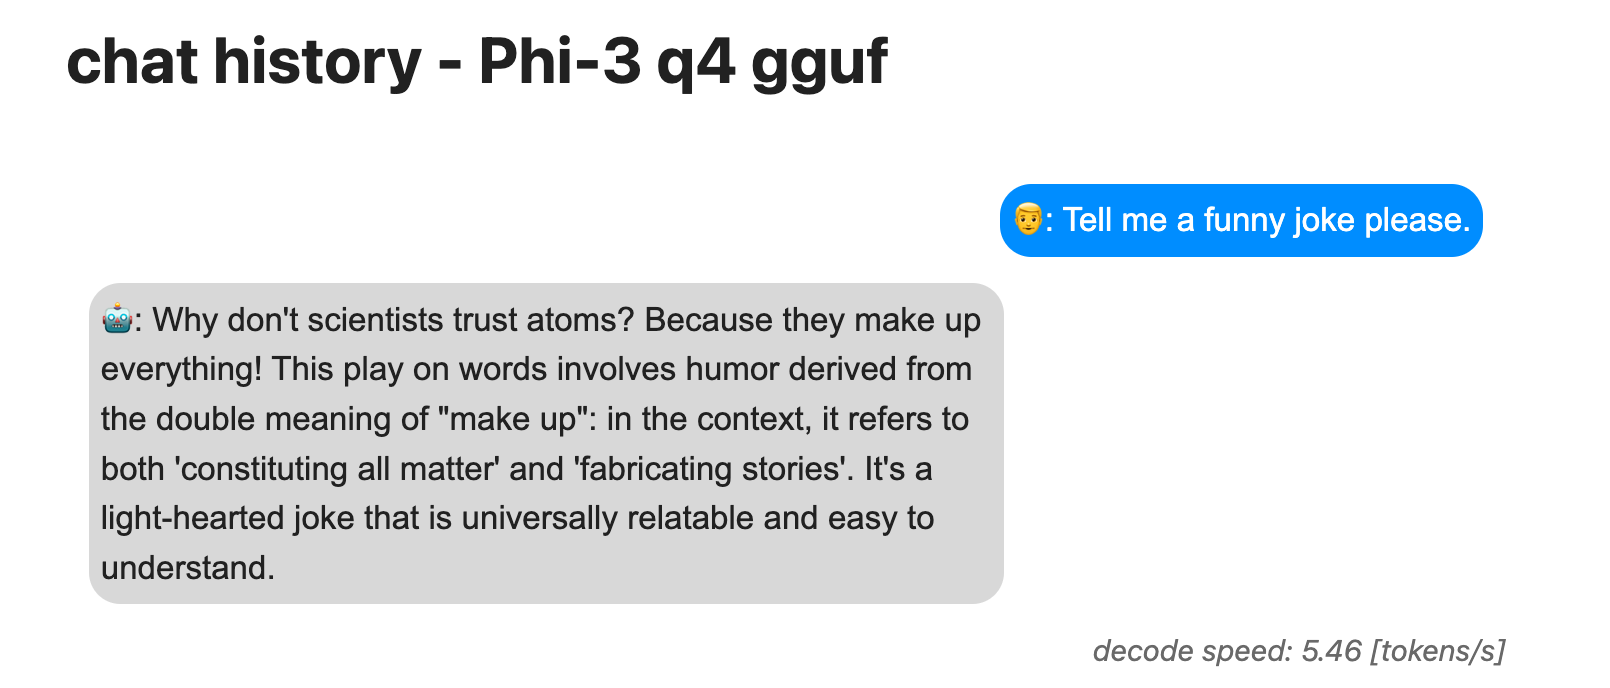
Rendering content with jinja
To create the iMessage-like output of the convo history between user and llm agent we can use a bit of css with jinja templating. Notice how in the code above we pass a context object to the render_template function; this is where we provide the loaded conversations from the Redis cache.
The styling is handled by the templates below:
<!-- Base template -->
<!doctype html>
<html lang="en">

<head>
    <!-- Required meta tags -->
    <meta charset="utf-8">
    <meta name="viewport" content="width=device-width, initial-scale=1">
    <!--Simple.css-->
    <link rel="stylesheet" href="https://cdn.simplecss.org/simple.min.css">
    <title>chat history</title>
</head>

<body>
    <div>
        {% block content %}

        {% endblock %}
    </div>
</body>

</html>
<!-- chat template -->
<style>
.chat {
width:100%;
border-radius: 1em;
padding: 0.5em;
margin-top: 2em;
overflow: auto;
font-size: 0.9em;
}
.text{
display: flex;
max-width: 65%;
padding: 0.35em;
border-radius: 0.95em;
font-family: Arial;
font-weight: 200;
margin:0.2em;
}
.msg-user{
background: #218aff;
float: right;
color: white;
}
.msg-agent{
background: #d8d8d8;
float: left;
}
.meta-info{
color: #696969;
float: right;
margin-bottom: 7em;
font-size:0.8em;
}
</style>
{% extends "home.html" %}
{% block content %}
<!-- <!--index.html-->
{% if context %}
<h3>chat history - Phi-3 q4 gguf </h3>
{% endif %}
{% for item in context.objects %}
<div class="chat">
{% for entry in item.chat_history %}
{% if entry.role == 'user' %}
<div class = "text msg-user">
👨: {{entry.content}}
</div>
{% else %}
<div class = "text msg-agent">
🤖: {{entry.content}}
</div>
{% endif %}
<br>
<br>
{% endfor %}
</div>
<em class="meta-info">decode speed: {{item.speed}} [tokens/s]</em>
{% endfor %}
{% if context.objects|length == 0%}
<h3>start chatting!</h3>
{% endif %}
{% endblock %}
With the flask app running, send a few requests to the chat/completions/ endpoint as such:
curl -H 'Content-Type: application/json' -X POST -d '{"messages": [{"role": "user", "content": "Tell me a funny joke please."}], "temperature": 0.8, "max_tokens": 64}' localhost:4440/chat/completions/ | jqAfter a few seconds you should be able to see your question and the llm response in-browser at localhost:4440/chat/completions/
Dockerizing
Now that we have routing, inferencing, and caching in place the only thing left to do is to clearly define each service in a docker-compose.yml so that anyone can use the project. The only changes we need to make are swapping “localhost” for the redis service name and properly setting up volumes so docker can find the model weights.
The config yaml looks like this:
version: "3"
services:
  redis:
    image: "redis:latest"
  worker:
    build:
      dockerfile: Dockerfile
      context: .
    ports:
      - "4440:4440"
    environment:
      - PYTHONUNBUFFERED=1
    volumes:
      - ~/.cache/huggingface/hub/:/app/models
PYTHONUNBUFFERED=1 is just there so any print statements from within the flask app show up on our console.
The Dockerfile for the worker service looks like:
FROM python:3.10-bookworm

WORKDIR /app

RUN pip install -U pip &&\
    pip install torch torchvision  --index-url https://download.pytorch.org/whl/cpu --no-cache-dir

COPY ./requirements.txt .

RUN pip install -r requirements.txt --no-cache-dir

COPY . .

CMD ["python", "app.py"]
References
- Phi-3 Technical Report: A Highly Capable Language Model Locally on Your Phone by Abdin et al.
- Accelerating-Phi-3 ONNX Runtime blog post